So, one of the best things for ultimate self-confidence when wearing a hair system is knowing that it is securely installed. Can you imagine the system shifting, sliding, or flipping up due to a poor bond? It can probably be agreed by all that this is not an ideal situation. Granted those are extreme instances. More than likely, lifting at the hair line is the most common thing you’ll experience. Different bases work better with different attachment products and methods. This subject has been touched upon briefly in previous posts but let’s go into some more detail.
A good prep is key to a secure adhesion. Begin with a clean scalp. If you have bio hair that continues to grow in thin but consistent stubble or downy consistency, you’ll want to clear that. You can use hair clippers to take the hair very short. You can stop there, or you can take an additional step and shave the scalp as you would your face, with a shaving cream and razor. Caution should be observed with the actual shaving. Knicks or cuts will prove both uncomfortable in the next steps and offer a less than ideal foundation to which apply adhesive. These are after all chemicals and giving them an opportunity to seep under the scalp is best avoided.
Next thoroughly wash the scalp. Shampoos or soaps that don’t leave conditioning agents or other residue are best. Also avoid after shampoo conditioners. Remember the scalp needs to be clean without the interference of any oils or emollients rendered by such products. Optional but very important if well tolerated is the use of a scalp protector. This light, quick drying agent offers a barrier between the scalp and the adhesive. The matte finish is excellent for combatting perspiration and other precipitation from weakening the bond as well as minimizing shine. A patch test might be best if you have an exceptionally sensitive scalp. Once applied allow to dry. To speed up the drying process, a hair dryer on low heat can be used. Keep the dryer away from the scalp and in constant motion.
Next prepare your supplies for installation. You’ll want to have everything laid out and easily accessible. Remove any tops or lids from items such as liquid adhesives or cleaning agents. Have 91% isopropyl alcohol and a cloth for cleaning your hands and tools as you work. Sticky hands and fingers can be problematic when working with toupee. A comb and a hand mirror are also helpful. At this point, if you have used a scalp protector it should be fully dried. Just do a touch test to be certain.
On to the adhesives and methods of application.
Glues (i.e. Ghost Bond varieties):
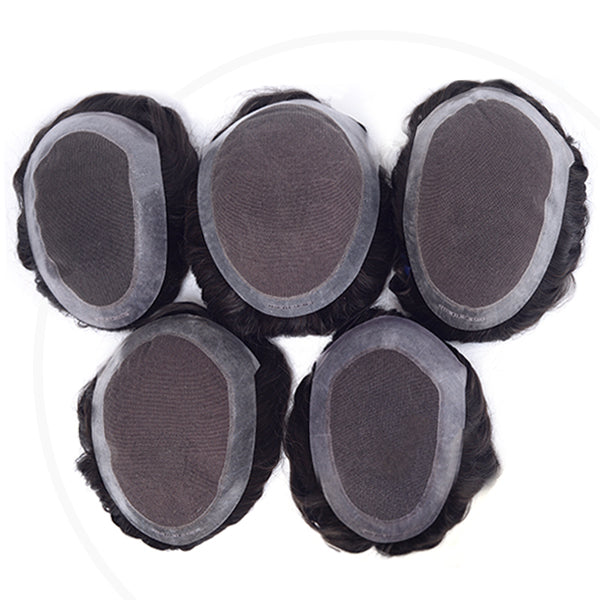
Good for full or partial polyurethane bases, these offer the option of full coverage of the scalp area to which they are applied. Depending on time allotted for installation, anywhere from two to four coats can be used. These adhesives go on white and dry perfectly clear. Once clear, it’s fully dry and ready for either the next coat, or the placement of the hair system. Adhesive can be applied to both the scalp and the base of the system if preferred. This method simulates a “contact cement” effect thought to strengthen the bond by introducing two adhesive coated surfaces to one another, with each enhancing the bonding strength of the other. You will go through a significantly increased amount of adhesive with this method.
Location of the hair system should already be established. A washable marking agent such a grease pen or eyeliner can be used to identify where the hairline is to start. Do not place the system over this mark or it won’t be wipeable for removal. Be aware that once the system makes contact with the adhesive, repositioning is virtually impossible. A light spray of the alcohol over the scalp will provided critical seconds for repositioning. Alcohol dissipates quickly, so while it offers a “wet” layer, its dries fast enough to not adversely affect the glue. The more alcohol used, the longer the time for correction of placement, however too much alcohol can weaken the final adhesion.
Place the system at the mark and begin to move toward the back of the head. Carefully and simultaneously stretch the base side to side and back keeping it taught, avoiding wrinkles, gathering or folds. Once in place press the system firmly to the scalp. If glue is present on the forehead, ear or in the hair of the system, wait a few minutes before removing with alcohol. Do not get alcohol into the hairline or all the hard work that you just did will need to be repeated. With this adhesion method, water should not be introduced to the system for at least 24 hours. Worth noting is that moisture (i.e., washing and perspiring) introduced beyond this period of time can cause the glue to become milky white. Avoid any manipulation of the hair system during this time. The adhesive will revert to its clear and secure state once dry. A hair dryer on low heat not too close to the scalp and kept in constant motion can be used to expedite the drying process. The more you do this however, the shorter your full adhesion time will be. You will need to perform more frequent touch ups/ reattachments at the hairline. One other shortcoming in this circumstance is that if you are in a public setting such as a gym, a pool, or just a hot day when perspiration is inevitable, others may be able to notice this milky white appearance. Keep your hairline as dry as possible immediately after such activities.
If you are looking for an adhesion method that offers the option of immediate access to water, there is a solution. Walker’s Ultra hold adhesive used in combination with Max Hold Sport scalp protector. This combination is touted to be instantly impervious to water while offering a superior bond. The instance of color changing when wet is alleviated. This adhesive requires a more skilled user due to its consistency, instant adhesion and overall difficulty applying. It is not advised for the first-time hair system installer. However, if you can successfully complete an installation with this product, veteran system installers note that you will reap notable success in bond longevity.
When time for touch ups and reinstalls there will be a high level of work involved with the cleanup of all liquid adhesives. Let’s move on to tapes.
Tapes are strips of waxed backing with adhesive pre-applied. They come in rolls, as well as precut, sectioned tabs. They are two sided with one side equipped with a split covering that is removed after placement of the “sticky” side on the scalp or system. Tapes are offered in varying levels of adhesion strength. Stronger hold is best used on polyurethane bases. There are tapes that have a lighter adhesion level that are better suited for lace base systems. Unless outfitted with a polyurethane border, it is ill advised to utilize liquid adhesives on any surface that is lace. The adhesive can seep through the lace and into the hair, rendering it impossible to style and uncomfortable to wear. Note that a knot sealer should always be used with lace base systems. The sealer greatly reduces the instance of pulling out hairs when removing tapes. Tapes can be applied to the scalp or the system but not both as mentioned with liquid adhesive methods.
The same prep methods can be employed with installation. Tapes are placed on the perimeter of the base and space left between the tapes can help with drainage of water from the scalp, as in the instance of a lace base system. Avoiding “trapped” water is best for aiding in a secure long-lasting bond. A few tapes can be placed in the middle of the base of the system or on the scalp for a more secure feel.
Tapes are popular due to the ease of cleanup that they offer. A perimeter of tape is easily removed with citrus based solvent such as C-22. Spray the tapes, allow to sit, and soak for a few minutes. For lace systems, apply the solvent to a cotton round or ball and apply the solvent. Then take a towel specifically assigned for hairpieces maintenance and start to roll the tapes off the hair system base. Once removed, wipe the base again with the solvent. Solvents do leave an oily residue on polyurethane. To eliminate this, try a final wipe with alcohol, or clean the polyurethane with a cloth dampened with water and a very small amount of Dawn dishwashing liquid. Avoid getting any of these products into the hair of the system, as much as possible. You can now proceed with the remaining steps of your install.
There you have it, adhesion products and methods in a nutshell. Thanks for reading.


Leave a comment (all fields required)